> ## Documentation Index
> Fetch the complete documentation index at: https://statsig-4b2ff144-mintlify-add-local-eval-country-note-96362.mintlify.site/llms.txt
> Use this file to discover all available pages before exploring further.
# Cloudflare KV
Statsig offers a set of integrations that make usage with Cloudflare easy:
* Automatically pushing changes to Cloudflare's KV store, for low-latency SDK startup
* A helper pattern that handles Statsig SDK overhead, so you can focus on worker logic
Navigate to [Project Settings -> Integrations](https://console.statsig.com/integrations), in the Statsig Console, then select Cloudflare, and input:
* **Cloudflare Account ID**: Can be found in Cloudflare portal on the Compute (Workers) page, under Account Details
* **KV Namespace ID**: Create a new namespace, then go to Account Home -> Storage and Databases -> Workers KV, and copy the ID from the table view.
* **Cloudflare API Key**: In Cloudflare portal under Account Home -> Profile -> API Tokens. Use a token with Account.Workers KV Storage Edit Permissions.
You can also filter the configs that are synced to your KV namespace by Target App. This becomes important as you add more configs to your project, but for now, you can leave this unchecked.
Click **Enable**, then the Statsig backend will push a config to your KV namespace (\<60 seconds). In your KV namespace, navigate to **KV Pairs** - you'll see entry starting with `statsig-`. This is the `key` associated with your KV storage. Note this key down for later.
Now, we'll set up a worker to read those experiments and gates from your KV namespace. If you've never created a worker before, you can follow the instructions [here](https://developers.cloudflare.com/workers/).
After creating your worker, you will need to connect your KV store to your worker through a binding. Navigate to **Compute (Workers)** -> **Select Your Worker** -> **Bindings** -> **Add binding** -> **KV namespace**. Name your binding under **Variable name**. Under **KV namespace**, select your KV store name. For more information on connecting your worker to your KV store, you can follow the instructions [here](https://developers.cloudflare.com/pages/functions/bindings/).
Install the Statsig serverless SDK:
```bash theme={null}
npm install @statsig/serverless-client
```
The helper method takes two arguments, a handler function, and a ParamsObject. **Put *all* of your worker logic in the handler function**, along with your Statsig usage.
```javascript highlight={5} theme={null}
import { handleWithStatsig } from '@statsig/serverless-client/cloudflare';
export default handleWithStatsig(
async (request, env, ctx, client) => {
// Your business, and Statsig logic here
},
{
kvKey: 'kv_key',
envStatsigKey: 'statsig_key',
envKvBindingName: 'STATSIG_KV'
}
);
```
The required ParamsObject params (kvKey, envStatsigKey, envKvBindingName) must be stored as env variables, either in your wrangler.toml or as Cloudflare secrets.
Environment variable name containing your KV pair key
Environment variable name containing your Statsig client key
Your KV binding name
See StatsigOptions [here](https://docs.statsig.com/client/javascript-sdk#statsig-options)
**Best practice:**
* store `envStatsigKey` as a Cloudflare secret. You can set this in the Cloudflare dashboard under, **Worker → Settings → Variables and Secrets**
* store `kvKey` and `envKvBindingName` in your wrangler.toml
### Example Usage
This is an example of an end-to-end worker function that uses the Statsig SDK and returns a flag value. This is all you need - this will compile as the index.js file in your worker.
```javascript index.js expandable theme={null}
import { handleWithStatsig } from '@statsig/serverless-client/cloudflare';
export default handleWithStatsig(
async (request, env, ctx, client) => {
const randomUserId = Math.floor(Math.random() * 100).toString();
const gate = client.getFeatureGate("test_cloudflare_sync", { userID: randomUserId });
const value = gate.value;
client.logEvent('new_event', { userID: randomUserId });
return new Response(`Gate check result: ${value}`);
},
{
kvKey: 'kv_key',
envStatsigKey: 'statsig_key',
envKvBindingName: 'STATSIG_KV'
}
);
```
```wrangler wrangler.toml theme={null}
name = "test"
main = "src/index.js"
compatibility_date = "2025-09-10"
[vars]
kv_key = "statsig-1gh32fg61hds9876"
[[kv_namespaces]]
binding = "STATSIG_KV"
id = "b76664aa8259481e834e7c549443c6541"
[observability]
enabled = true
```
**That's it!** The helper automatically:
* Initializes the Statsig Client with config specs from your KV store
* Executes your handler code (Your business logic + Statsig usage)
* Flushes all events after your handler completes execution
* Cleans up resources
**Use the advanced/manual setup if:**
* You need fine-grained control over initialization timing
* You need fine-grained control over event flushing timing
* You need to customize error handling behavior
## Prerequisites
1. Completed the [Statsig Cloudflare KV integration setup](#configure-integration)
2. [Created and bound a KV namespace to your worker](#add-the-statsig-sdk-to-your-worker)
## Installation
First, you'll need to install the Statsig serverless sdk.
```bash theme={null}
npm install @statsig/serverless-client
```
## Import
Next, import the Cloudflare client.
```bash theme={null}
import { StatsigCloudflareClient } from '@statsig/serverless-client/cloudflare';
```
Then, you need to hook it all up. This involves:
1. Creating a `StatsigCloudflareClient` instance.
2. Initializing the Statsig client
3. Checking a Gate
4. Logging an event
5. Flushing events to Statsig
If you've used a Statsig sdk in the past, these steps should be familiar. The usage will be the same, the only difference is the sdk will initialize from the KV store instead of the statsig backend.
In our example, we are checking a gate called "test\_cloudflare\_sync" that is set to a 50% pass rate. We create a random userID on every request, and we should see it evaluate to true 50% of the time.
### 1. Creating a `StatsigCloudflareClient` instance
```bash theme={null}
const client = new StatsigCloudflareClient("");
```
The client instantiation takes two arguments:
* `sdkKey : string` This is your Statsig client API key. It is available from the [Project Settings](https://console.statsig.com/api_keys) page in the Statsig Console. This is used to authenticate your requests.
* `options : StatsigOptions` See here, for more [options](https://docs.statsig.com/client/javascript-sdk#statsig-options).
For best practice:
* store `sdkKey` as a Cloudflare secret. You can set this in the Cloudflare dashboard under, **Worker → Settings → Variables and Secrets**
### 2. Client initialization
The following line initializes the client by loading feature gate and experiment configurations directly from your Cloudflare KV store.
```bash theme={null}
const initResult = await client.initializeFromKV(env., );
```
The client initialization takes two arguments:
* `KvBinding` This is the binding you named earlier. Remember to provide this argument as `env.YOUR_KV_NAMESPACE_BINDING`
* `KvKey : string` This is the KV pair key that was generated through the Statsig integration. It can be found under **Workers KV** -> **Your KV namespace** -> **KV Pairs**
For best practice:
* store `kvBinding` and `kvKey` in your wrangler.toml
### 3. Checking a Gate
```bash theme={null}
const value = client.checkGate("test_cloudflare_sync", { userID: randomUserId });
```
This is a gate check in code.
The `checkGate` method takes two arguments:
* `name : string` The name of the Statsig gate that you are checking.
* `user : StatsigUser` The Statsig user object for whom the gate is being checked. For more information on the user object, see [here](https://docs.statsig.com/sdks/user#introduction-to-the-statsiguser-object).
Refer to the [Javascript on device evaluation sdk documentation](/client/jsOnDeviceEvaluationSDK) for how to check other entities like experiments and dynamic configs.
### 4. Logging an event
```bash theme={null}
client.logEvent('gate_check', { userID: randomUserId });
```
This is an event log in code.
The `logEvent` method takes two parameters:
* `eventOrName : string | StatsigEvent` This is the name and details of the event you are logging.
* `user : StatsigUser` The Statsig user object for whom the event is being logged.
For more information on event logging, see [here](https://docs.statsig.com/client/jsOnDeviceEvaluationSDK#logging-an-event).
### 5. Flushing Events
```bash theme={null}
ctx.waitUntil(statsig.flush());
```
This flushes all events from the sdk to Statsig. **Without this, you wont be able to get diagnostic information in the Statsig Console, nor any event data you logged**.
### Putting it all together
```Javascript theme={null}
import { StatsigCloudflareClient } from '@statsig/serverless-client/cloudflare';
export default {
async fetch(request, env, ctx) {
try {
const client = new StatsigCloudflareClient(env.statsig_key);
const initResult = await client.initializeFromKV(env.STATSIG_KV, env.kv_key);
const randomUserId = Math.floor(Math.random() * 100).toString(); //generates a random user id
const value = client.checkGate("test_cloudflare_sync", { userID: randomUserId });
client.logEvent('gate_check', { userID: randomUserId });
ctx.waitUntil(client.flush());
return new Response(`Value: ${value}, userID: ${randomUserId});
} catch (error) {
return new Response(`Error: ${error.message}`, { status: 500 });
}
}
};
```
```wrangler theme={null}
name = "test"
main = "src/index.js"
compatibility_date = "2025-09-10"
[vars]
kv_key = "statsig-1gh32fg61hds9876"
[[kv_namespaces]]
binding = "STATSIG_KV"
id = "b76664aa8259481e834e7c549443c6541"
[observability]
enabled = true
```
If you want to check on the evaluations you are getting, you can go to the gate you created for this example and look at the evaluations in the Diagnostics tab.
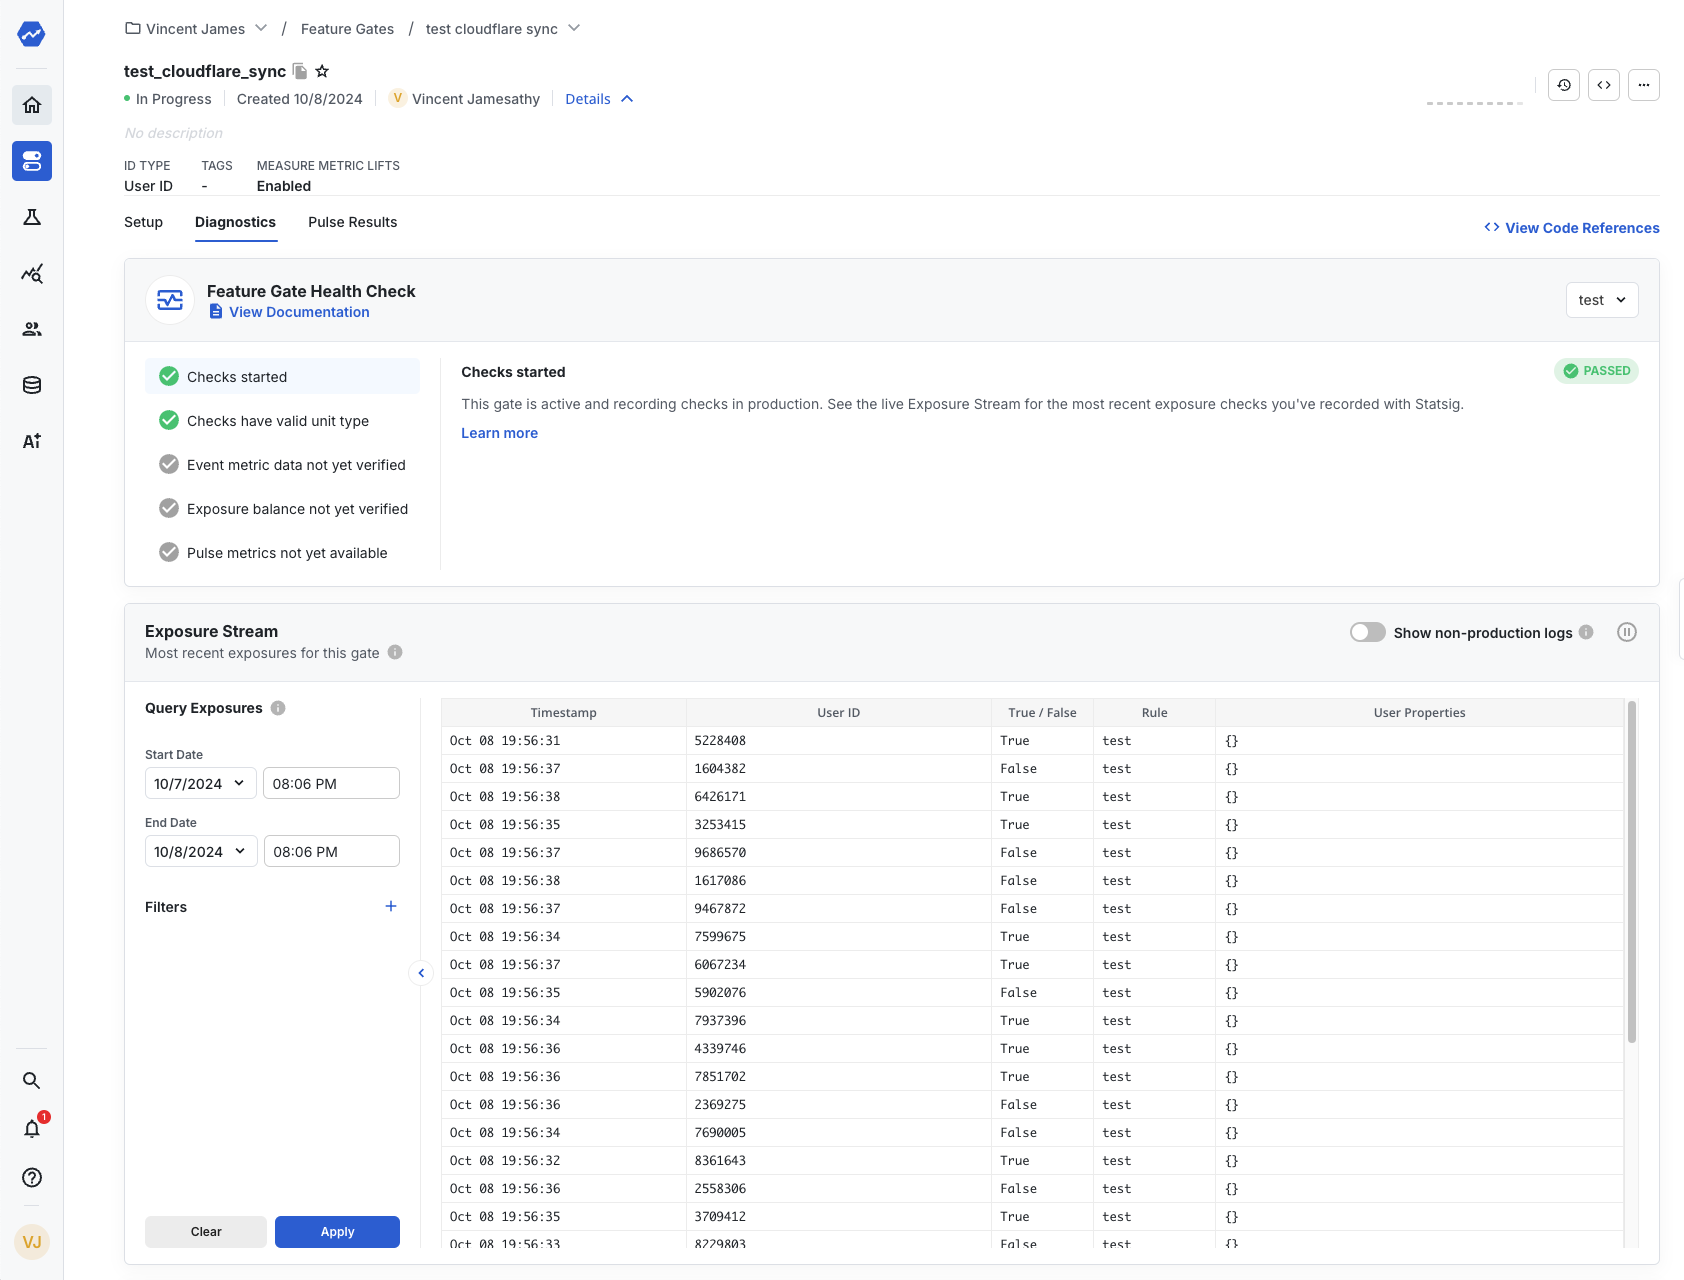 If you want to check the events you logged, in the **Statsig Console**, go to **Data** -> **Events**
 And there you have it - a working Cloudflare KV integration for Statsig.
## Other Considerations
### Polling for updates
The SDK cannot poll for updates across requests since [**Cloudflare does not allow for timers**](https://developers.cloudflare.com/workers/reference/security-model/#step-1-disallow-timers-and-multi-threading).
To optimize for edge use cases, we do not provide an api to recognize updates to your config specs. However, when a change is made to your project definition on the Statsig console, the changes will be propagates to the KV store and will be reflected the next time you initialize the Cloudflare client.
### Flushing events
The SDK enqueues logged events and flushes them in batches. In order to ensure events are properly flushed, we recommend calling flush using context.waitUntil. This will keep the request handler alive until events are flushed without blocking the response.
```bash theme={null}
context.waitUntil(client.flush());
```
### Size Limits
Cloudflare KV has maximum size limits that may prevent Statsig from pushing configs into your KV. See [here](https://developers.cloudflare.com/workers/platform/limits/#kv-limits) for the latest Cloudflare KV limits. If your payload continues to grow, you will need to set the option to filter the payload by a Target App in the integration settings.
### Unsupported Features
Statsig ID Lists are not currently synced into Cloudflare KVs. If you rely on large (>1000) ID lists, you will not be able to check them in your Cloudflare Worker.
And there you have it - a working Cloudflare KV integration for Statsig.
## Other Considerations
### Polling for updates
The SDK cannot poll for updates across requests since [**Cloudflare does not allow for timers**](https://developers.cloudflare.com/workers/reference/security-model/#step-1-disallow-timers-and-multi-threading).
To optimize for edge use cases, we do not provide an api to recognize updates to your config specs. However, when a change is made to your project definition on the Statsig console, the changes will be propagates to the KV store and will be reflected the next time you initialize the Cloudflare client.
### Flushing events
The SDK enqueues logged events and flushes them in batches. In order to ensure events are properly flushed, we recommend calling flush using context.waitUntil. This will keep the request handler alive until events are flushed without blocking the response.
```bash theme={null}
context.waitUntil(client.flush());
```
### Size Limits
Cloudflare KV has maximum size limits that may prevent Statsig from pushing configs into your KV. See [here](https://developers.cloudflare.com/workers/platform/limits/#kv-limits) for the latest Cloudflare KV limits. If your payload continues to grow, you will need to set the option to filter the payload by a Target App in the integration settings.
### Unsupported Features
Statsig ID Lists are not currently synced into Cloudflare KVs. If you rely on large (>1000) ID lists, you will not be able to check them in your Cloudflare Worker.